Blazor Code Behind
Posted on 2019-10-06
UPDATE: On October 15th 2019, Microsoft announced the partial class support. A new version of this article is here.
If, like me, you start developing projects with Blazor, you may prefer to separate your HTML code from your CSharp code.
Indeed, all the examples presented by Microsoft use this format, where the code is injected from the web page via the @code attribute.
<!-- File "Counter.razor" -->
@page "/counter"

<h1>Counter</h1>
<p>Current count: @currentCount</p>
<button @onclick="IncrementCount">Click me</button>

@code {
    int currentCount = 0;

    void IncrementCount()
    {
        currentCount++;
    }
}
Personally, I prefer to decompose the visual into a .razor file and the CSharp code into a .razor.cs file.
It is done without difficulties, by creating:
- A
Counter.razorfile that refers to the class via@inherits. - A
CounterBaseclass that inherits fromComponentBase.
Example:
<!-- File "Counter.razor" -->
@page "/counter"
@inherits CounterBase

<h1>Counter</h1>
<p>Current count: @currentCount</p>
<button @onclick="IncrementCount">Click me</button>
// File "Counter.razor.cs"
public partial class CounterBase : ComponentBase
{
    public int currentCount = 0;

    public void IncrementCount()
    {
        currentCount++;
    }
}
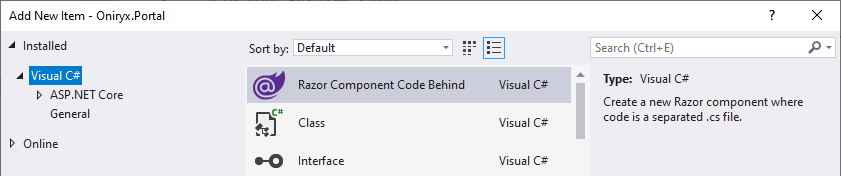
Item Template
Creating these two files is often time-consuming, so I created an Item Template for Visual Studio. To use it:
- Download this ItemTemplate-RazorComponentCodeBehind.zip.
- Copy it into the folder %USERPROFILE%\Documents\Visual Studio 2019\Templates\ItemTemplates.
- Restart Visual Studio.
So, you will find a new model of composants.